
Personal Contact Information
i) Mailing Address Management
ii) Phone Number Management
iii) Email Address Management
To view, change, add or remove information for mailing address(es), email address(es) or telephone number(s), click Personal Contact Information from the myINFO toolbox.
i) Mailing Address Management
There are three types of addresses that can be listed: Home, Business or Other Address. You must always have a current Home address listed, whereas Business and Other Address are optional.
To update mailing address, select Personal Contact Information from the myINFO toolbox.
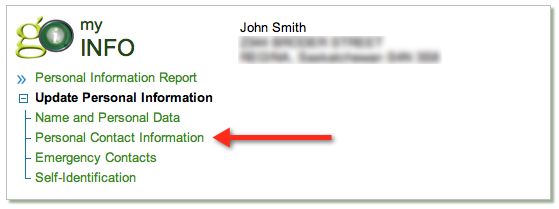
Edit or remove a mailing address
To update your mailing address, select the edit button and free-form fields will appear, allowing you to make changes.
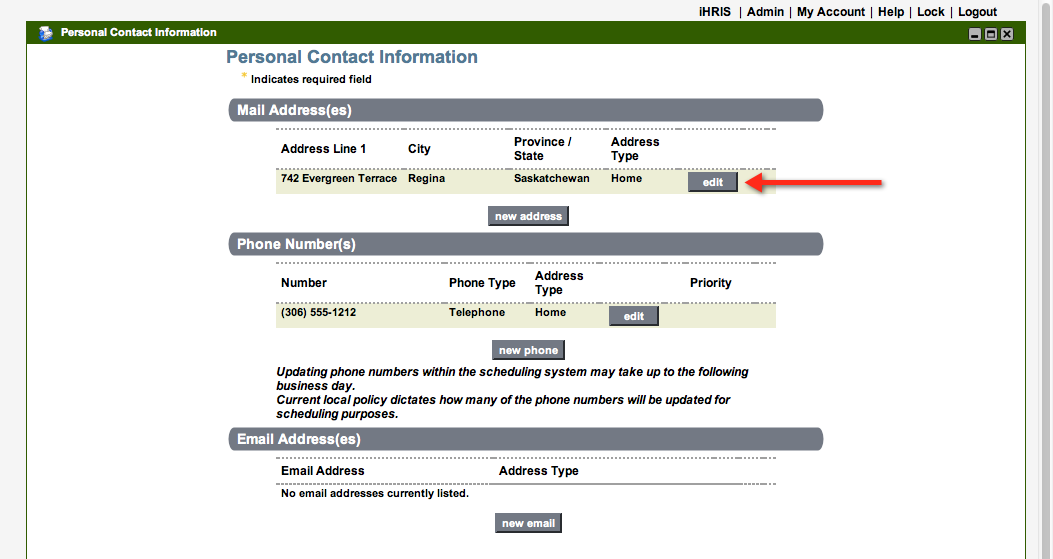
Enter in the necessary changes in the fields provided. All fields marked with a yellow asterisk* are mandatory.

TIP: Hover the cursor over a field and a Help Box will pop up to give information about that field.
Select confirm to have changes saved; a message indicating your form is being submitted will appear briefly. This updated address will be sent directly to the payroll system.

To remove a mailing address, select remove button beside the address you wish to delete. A message will appear asking if you want to remove the address. Select yes to delete the address or no if you do not wish to delete the address.
Add a new mailing address
To add a new mailing address, select the new address button.
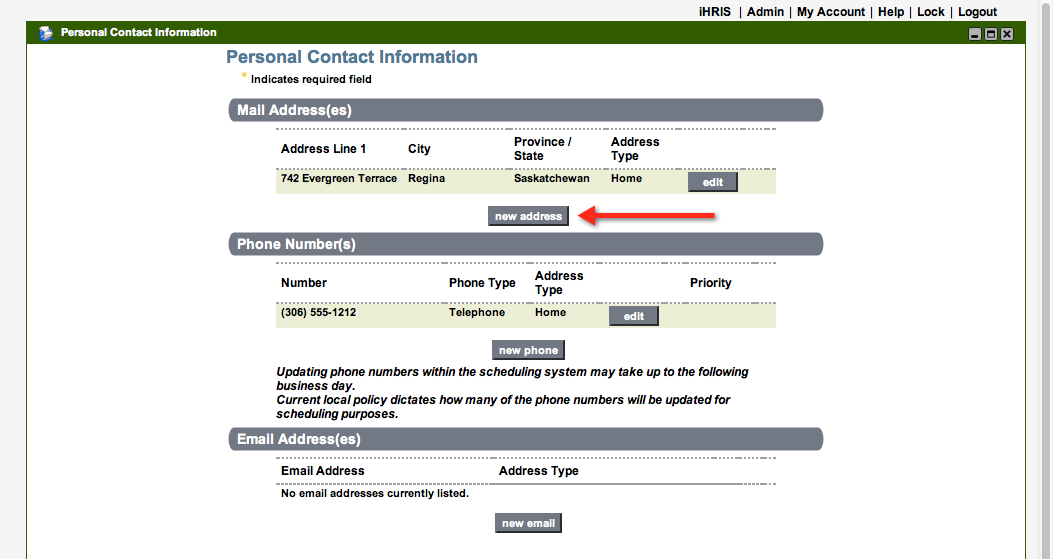
You will be re-directed to a blank form allowing you to enter new address information. The Address Type, Country and Province areas will each have a drop-down list. All other fields are free-form to accommodate new address information.

To save your changes and add a new mailing address, select confirm. This new address will be automatically updated in the payroll system. Should you select cancel, your changes will not be saved and you will be re-directed back to a read-only page.

iii) Email Address Management
To add, edit and/or remove an email address, select Personal Contact Information from the myINFO toolbox.

Scroll down the screen to the Email Address(es) section.
Add a new email address
To add an email address, select the new email button and enter the email address information and an effective date.

Select confirm to have the information saved. A message indicating the form is being submitted will appear briefly; you will then be re-directed to a read-only screen of your information.

Edit an email address
To edit existing email information, select the edit button.

This will bring up your current email address information in a free-form field to allow you to change the information. Select confirm to save your changes or cancel to cancel your update.

Remove an email address
To remove an email address, select the remove button.

A confirmation message will pop up requiring you to confirm you really wish to remove the email address from Gateway Online.

If you select yes, a message will briefly appear indicating your form is being submitted. You will then be re-directed to a read-only page displaying your current information.
If you select no, you will be re-directed to a read-only page displaying your current information.
You can add, edit and remove telephone numbers as well as change the priority order in which the numbers are called. There are three phone types that can be listed: Home, Business or Other Address. You must always have a current Home phone listed, whereas Business and Other Address are optional.
To make changes to your phone numbers, select Personal Contact Information from the myINFO toolbox.

Add a phone number
To add a phone number, select the new phone button.
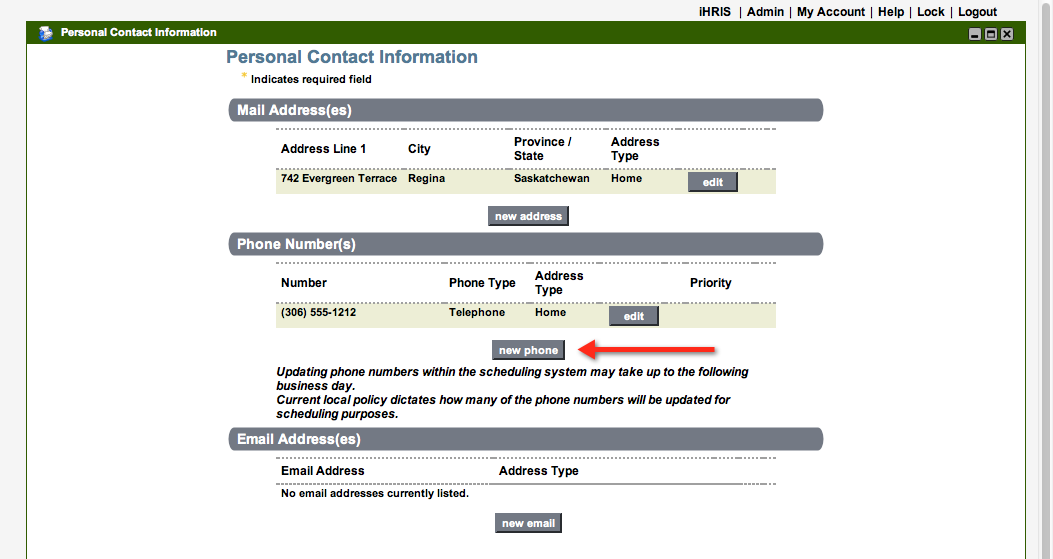
Complete all fields as necessary.

TIP: If your telephone number is outside of North America, tick off the Outside N.A. box. If your number is unlisted, tick off the Unlisted box.
Once complete, select confirm; a message will briefly appear indicating that your information is being submitted. This new phone number will be automatically sent to payroll and scheduling departments where applicable systems will be updated automatically. Reminder: Updating phone numbers in Gateway Online may take up to the next business day for the change to be in effect within the scheduling department. You can update or add as many phone numbers as you wish; however, be aware that the number of phone numbers used by the employer for scheduling purposes is as per the local policy. If you select cancel, your changes will not be saved and you will be re-directed to a read-only page of your current information.

Edit a phone number and its priority
To edit an existing phone number, select the edit button.

Update the information as required.

Once complete, select confirm; a message will briefly appear indicating that the user’s information is being submitted. This new phone number will be automatically sent to payroll and scheduling departments where applicable systems will be updated automatically. Reminder: Updating phone numbers in Gateway Online may take up to the next business day for the change to be in effect within the scheduling department. You can update or add as many phone numbers as you wish; however, be aware that the number of phone numbers used by the employer for scheduling purposes is as per the local policy. If you select cancel, your changes will not be saved and you will be re-directed to a read-only page of your current information.

The number of phone numbers called by a Scheduler/Manager for scheduling purposes varies by region and by Collective Agreement. You have the ability to enter an unlimited number of phone numbers; however, the phone numbers that will be used for scheduling purpose will be based on your employer policy/Collective Agreement of employment and how you prioritize your phone numbers. If you are unsure of your employer’s or Collective Agreement’s policies please contact your Schedulers or Manager.
Example: An employee is co-employed in region A (allows two phone numbers) and region B (allows five phone numbers). The phone number prioritized as 1st and 2nd will be called by both regions but the numbers prioritized as 3rd through 5th will only be called by region B.
To change the priority order of the numbers in Gateway Online for scheduling call in purposes, click on the green circled arrows on the right-hand side to move the priority of the phone numbers up or down. This information will be sent to the scheduling department.

Please note that when you change your telephone number priority there is no Confirm/Cancel option. The numbers are moved/up down the priority list according to what you have selected.
Remove a phone number
To remove a phone number, select the remove button.

A confirmation message will pop up requiring you to confirm you really wish to remove the phone number from Gateway Online.
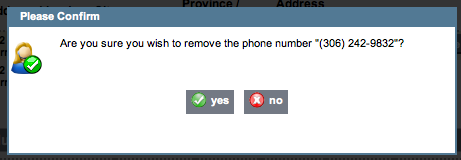
If you select yes, a message will briefly appear indicating your form is being submitted. You will then be re-directed to a read-only page displaying your current information.
If you select no, you will be re-directed to a read-only page displaying your current information.
TIP: Updating phone numbers in Gateway Online may take up to the next business day for the change to be in effect within the scheduling department. You can update or add as many phone numbers as you wish; however, be aware that the number of phone numbers that will be used by the employer for scheduling purposes is as per the local policy.
Workflow Console Tasks
Any phone number changes submitted through GO need to be acknowledged by your Employer. Certain roles in your organization are set up to receive notifications of these phone number changes (such as External Scheduler). Once you submit your change, a workflow notification will be created. You can see and track this workflow notification in your Workflow Console, otherwise known as Tasks. The Tasks tab can be found on the left of your screen (see picture below).

Clicking on the Tasks icon, will open up a second window presenting three tabs - To Do List, In Progress, and Completed, where you can track your tasks.

When you submit a change, a task will be created and displayed in your In Progress tab.

To view the details of the task, click the [view] button under the Details column.
Once your Employer acknowledges/completes the task, it will move to your Completed tab.
Click here for more information about the Workflow Console.
To change the priority order, click on the green circled arrows on the right-hand side to move the priority of the phone numbers up or down.

